
To set up a site in Dreamweaver first choose Site>New Site (or choose Manage Sites if you have previously set up the basics and you are ready to go live).

Then switch from the 'Basic' site definition wizard to the 'Advanced' tab:

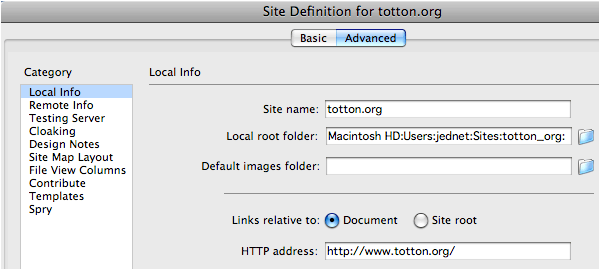
In the first section you just need to give your site a name.
In the example below I have called it totton.org, call yours anything that will allow you to tell it from any of your other sites. You can have spaces and capitals in this name, but it is a good idea to keep it short under 20 characters perhaps.
This name will be seen only by you and is just to allow you to work on this site rather than any others you set up later.
You also need to make a folder or select an existing folder into which you will save everything that will become your live site. This is called your Local root folder. Click on the little folder symbol to the right of the Local root folder box and browse to where you want to save your site - making a new folder if necessary. Open the folder and then select it.
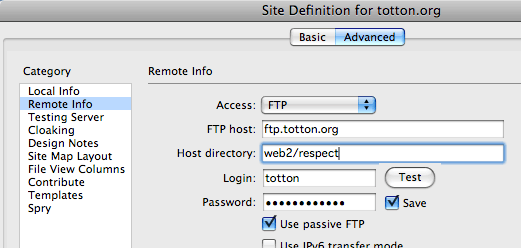
That's all you need to do to start working on a site in Dreamweaver. When you are ready to go live with the site you need to fill in the Remote Info tab as shown below, but with 'b' followed by your site root folder name in place of 'respect' - so the Host Directory will be b/your_folder_name
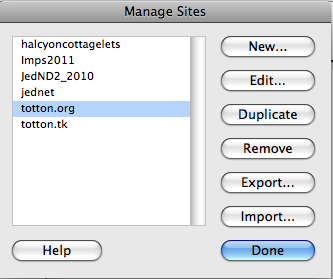
Then click OK, and when the list of your sites appears, click Done:
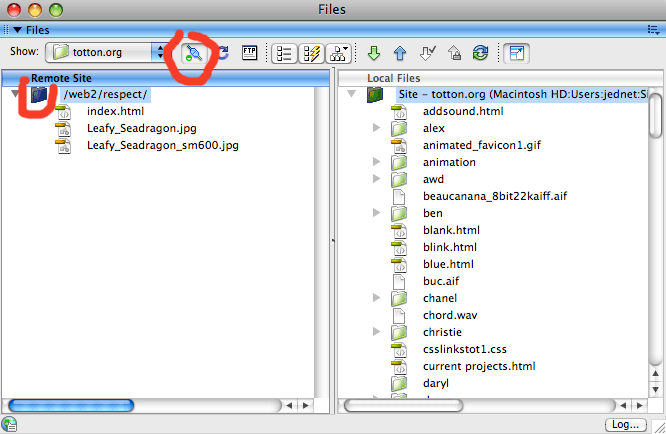
If all is well so far your local site will be shown in green in the Files palette that is usually in the bottom right of your Dreamweaver screen. Click on the Expand icon circled in red and the Files palette will expand to dominate your screen:

You should now see a list of your files stored locally on your computer's hard drive in your Site Root Folder (by default these are shown on the right) and now click on the plug and socket symbol (circled in red below) to connect to your live server space.
if everything has been entered correctly and you are able to connect, then on the left should be listed any files that you have previously uploaded to your live Web site. If you are trying to work on your live site for the first time and have nothing yet on your computer's drive, click on the main folder symbol and then click the green down-pointing arrow to download your site to your computer so that you can work on it.
Once you have downloaded your files you can then click on the expand icon a second time to restore the Files palette to its usual place at the bottom right of your screen.
Open a page to work on. When you have made changes, save the file and then Put it up to your live site by clicking on the Get/Put File Management icon at the top of your page and choose 'Put'.

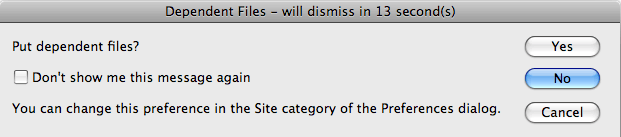
If you have only made changes to text then there is no need say yes to to 'Put dependent files' in the dialogue box that comes up. If you have added images or made changes to an external Cascading Style Sheet then say yes.
Check your live page in a variety of browsers, refreshing after each change to see it.